
Share this
by Luminite on Oct 10, 2022 3:15:00 PM
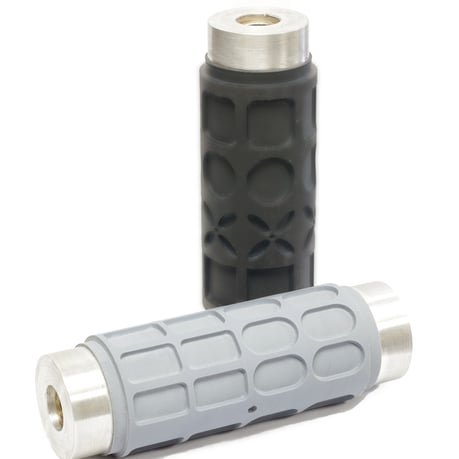
If you've ever wondered how the flexographic printing process works, an important component is the image carrier services. After an image has been provided and edited for the printing process, flexographic printing plates or cylinders are created.
Behind every image carrier that leaves Luminite Products Corporation, there is a carefully engineered process of creation.
We’ve outlined this process below to take you on a virtual tour of what happens behind the scenes on our shop floor, and to show you how we maintain quality and precision through every step of the production journey.
13 Steps of Flexographic Image Carrier Elastomer Sleeve Production:
There is some variance in the process dependent on customer requirements such as elastomer selection, adhesive requirements, dimensional considerations, and more -- However, for the majority of orders we follow the steps below:
- Receiving / Incoming Inspection
- Base Preparation
- Rubber Wrap
- Autoclave / Vulcanization
- Rough Grind
- Trim
- Finish Grind
- Polishing
- Laser Engraving
- Print Proof
- Final Clean-up
- Final Inspection
- Shipping
Step 1: Receiving / Incoming Inspection
All new and used sleeves, integral shafts, demounts and narrow web units that come into Luminite are carefully inspected to check that the specifications on bearing journals, bores, gears, etc. are in tolerance before going into production.
Any specification found out of tolerance is surfaced to the customer for repair or replacement options.
Luminite’s internal engineering staff is well equipped to provide a solution to any out-of-tolerance condition.
Additionally, air bases are mounted on an air mount stand to check proper air flow during this stage. The bases are accompanied by the engineering diagrams to retain accuracy during the mounting and dismounting processes.
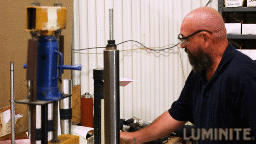
Following this, units that pass inspection are entered into the production stream.
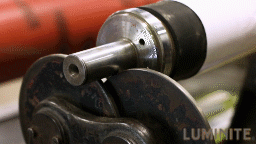
Step 2: Base Preparation
The bases are then carefully cleaned and prepared to begin the upcoming process.
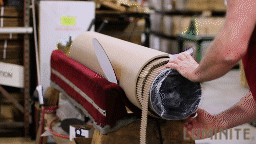
Step 3: Rubber Wrap
Primers and adhesives are then carefully applied to the units maintaining controlled thickness specifications. There can be anywhere from 1 to 3 applications depending on the elastomer being applied.
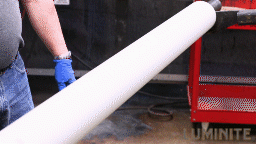
Specified dry times between coats and before elastomer application are carefully monitored to ensure bonding integrity.
The elastomer is applied to the unit using specialized elastomer strip building equipment. Rubber strips are fed into a machine where the rubber is heated and extruded through multiple strainer screens to ensure no contaminants are in the final product.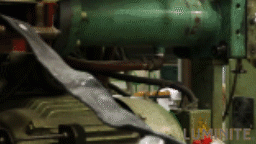
After the roller is built to the required size the elastomer is wrapped in special vulcanizing tape and contained on the ends to maximize pressure on the rubber during vulcanization (cross-linking).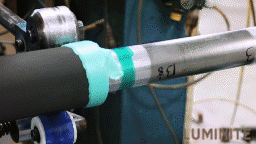
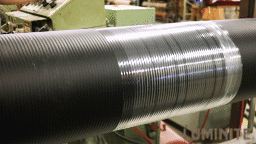
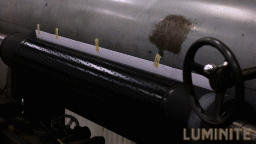
Step 4: Autoclave / Vulcanization
The wrapped image carrier is placed in the dry-heat Autoclave for curing. During this process, all seams are removed from the surface of the sleeve.
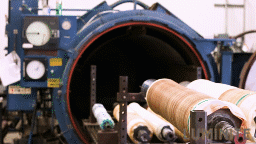
At Luminite, we opt for dry-heat to protect moisture from degrading the cylinders. Most rubbers are cured for a 24 hour period before the next steps can begin.
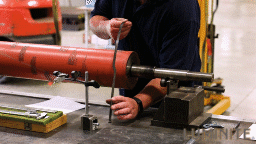
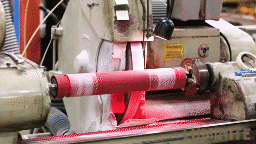
Step 5: Rough Grind
After the curing process is complete and rollers are cooled to ambient temperature. The vulcanizing tape is removed and rollers are rough ground or thermo-cut to a specified amount over the final finish diameter. This is dependent on the elastomer and stock removal method that was used.
The hardness of the rubber is initially verified to be in the specification at this point in the process.
Step 6: Trim
The goal of this step is to remove any excess rubber from the image carrier.
Additionally, the product is staged for finish grinding.
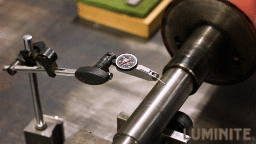
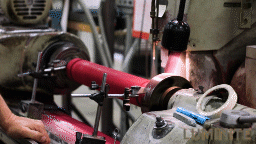
Step 7: Finish Grind
There is a 24 to 48-hour rubber stabilization period before the final grinding.
During the finish grinding process, special attention is given to temperature control to ensure dimensional stability. We use a variety of precision tooling and specialized hardware to precisely grind off the same journal, bearing, or bore that the rollers runs off of on press.
This helps to keep the most concentric rubber surface to impression roller contact possible.
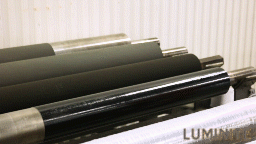
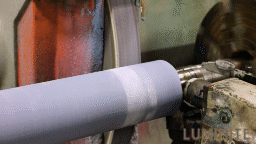
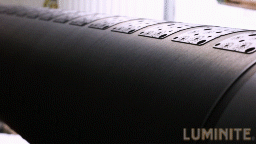
Step 8: Polish
Once the roller is at the specified finish diameter the surface is the micro-polished for a smooth consistent finish, roller after roller.
QC department monitors RA recording off the polisher on all jobs to ensure the rubber surface finishes are consistent time after time.
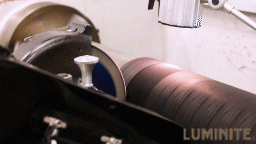
Step 9: Laser Engraving
In the laser engraving department, we house 3 digital direct laser engraving systems. These utilize both CO2 and Yag laser technology that can work either individually or simultaneously during the engraving process.

This gives Luminite the full spectrum of ITR engraving possibilities.
The digital engraving files can be either provided by the customer or fabricated by our in-house graphics technicians working in concert with the end-user.
Read more below for more information on our laser engraving services:

Step 10: Print Proof
After the image is engraved into the roller and cleaned we start our inspection process. The first stage is to make an actual image proof of the roller.
This step verifies the concentricity of the ground surface, that the roller is free of any low spots or surface defects, all engraved elements are printing and providing sharp transfer. Once the proof is approved the roller is then inspected in its entirety to ensure all internal and customer-specific specifications are within tolerance.
Step 11: Final Clean-Up
We do a final clean-up of the roller. This removes any rubber that is not used for printing and may be left on the roller after engraving.
The roller is then thoroughly cleaned and wrapped in UV-resistant paper before removing it from the machine and forwarded to the shipping department.
Step 12: Final Inspection
Design, width, depth, and other flexo printing defects are all checked for during this phase.
Step 13: Shipping
Special care is paramount in the shipping of the roller. We use a multitude of protective wraps, end shock protection, corrugated tubes, boxes, wooden and steel crates.
Our team is willing to do whatever it takes to affirm the product arrives at its destination in the same condition in which it left Luminite.
Interested in learning about care after the sleeve arrives? Take a look at this blog about care and maintenance.
Flexographic Image Carrier Production: How Luminite Can Help:
Every step of our flexographic image carrier manufacturing process is accomplished with one goal in mind: Producing a final product that will make our customers happy, and help them reach their printing goals.
Would you like to see your image carrier on our shop floor?
Contact us today and let us know how we can help.
Something wrong with your prints? Check out our Flexographic Printing Defects Guide Below:

(Editors Note: This blog was originally published in Jun 2019 and was updated in October 2022 to reflect new information.)
No Comments Yet
Let us know what you think