Share this
What Is Distortion in Flexo Printing? Plate Thickness is One Factor
by Luminite on Mar 17, 2021 9:00:00 AM

If you’ve ever seen a child play with Silly Putty and newspaper, then you’ve seen image distortion at work. When the putty is pressed to the newspaper, the ink and text are transferred. Then, when the child stretches the putty -- or even puts it around another object -- the image is also stretched.
Those in the flexo printing industry see this process in action every single day.
But, in flexo, image distortion is a lot less fun. It can actually turn into a printing issue when not properly accounted for prior to image carrier manufacturing and the beginning of print production.
About Flexo Print Distortion
Distortion in flexographic printing occurs when the (relatively) soft material of the printing plate is wrapped around the hard cylinder while being mounted on the press.
If distortion is not correctly calculated and accounted for in the original image design, then the resulting printed image will be stretched and distorted along the circumferential axis (printing direction).
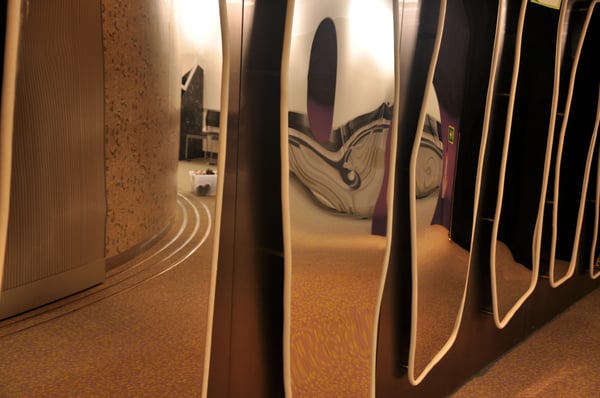
This type of distortion lends the images and texts on your final printed products a squished or elongated appearance, as if you were viewing your original image in a funhouse mirror -- which will lead to misregistration.
Can Distortion in Flexo Printing Be Prevented?
The short answer is absolutely yes. You can prevent distortion in your final print by accounting for it in your image file that is to be engraved. The engraved image will not resemble the correct proportions until the plate is wrapped and mounted to your specific printing cylinders.
This process requires a calculation to determine the distortion factor for your specific flexographic printing plates. Calculating your distortion requires the knowledge and measurement of:
-
Print repeat
-
Plate mount base circumference
-
Plate thickness
-
Sticky back thickness
-
Gear tooth (if needed)
4 Steps to Calculate Distortion in Flexographic Printing
To determine exactly how drastically your flat image needs to be foreshortened to account for image distortion, follow these steps:
-
You will first need to measure the repeated length of your print job.
-
Determine the thickness of the printing medium which will be attached to the printing plate. This usually includes a polyester backing attached to a photopolymer coating.
-
Calculate the plate thickness constant using the following equation:
-
Plate Thickness Constant = 2π (Photopolymer Thickness)
-
Determine the distortion factor with the following equation:
-
Distortion Factor % = (Plate Thickness Constant / Repeat Length) (100)
If you find the math daunting, enter your measurements into an online distortion calculator, like the one available here.
Opt for 100% Distortion Free Image Carriers
Calculating for distortion is only necessary for printing plates.
Our sleeves and cylinders are created and print 100% distortion free. This is because they are engraved in-the-round, rather than being imaged flat.
This allows for a continuous, seamless print, that produces beautiful final products after every run.
Get Additional Help Directly from Luminite's Printing Experts
Luminite’s team can walk you through our distortion free image carrier options and capabilities, removing the headache caused by distortion.
Editor's Note: This blog post was originally published January 21, 2019 and was republished on March 18, 2021 to reflect updated information.
Share this
- Flexographic Printing (81)
- Image Carrier (28)
- Elastomer sleeves (27)
- Ink Transfer (25)
- Quality (22)
- Flexo sleeve (20)
- News (18)
- printing defects (18)
- flexo printing defects (17)
- sustainability (13)
- Flexo Troubleshooting (12)
- Ink (12)
- Digital Printing (10)
- Flexo 101 (10)
- Flexo Inks, (9)
- Anilox (7)
- Blister Packaging (7)
- Cost (6)
- print misregistration (6)
- regulations (6)
- Corrugated Printing (4)
- pinholing (4)
- "Tradeshow (3)
- Digital Flexo (3)
- Gravure Printing (3)
- Insider (3)
- Load-N-Lok (3)
- Wide Web (3)
- direct laser engraving (3)
- flexo-equipment-accessories (3)
- gear marks (3)
- halo (3)
- testing (3)
- Narrow Web (2)
- bridging (2)
- feathering (2)
- filling in (2)
- mottled image (2)
- pressure (2)
- Labelexpo (1)
- dirty prints (1)
- doughnuts (1)
- embossing (1)
- kiss impression (1)
- October 2023 (2)
- September 2023 (1)
- August 2023 (1)
- July 2023 (3)
- June 2023 (1)
- May 2023 (5)
- April 2023 (1)
- March 2023 (2)
- February 2023 (1)
- January 2023 (3)
- December 2022 (1)
- October 2022 (3)
- September 2022 (2)
- August 2022 (2)
- July 2022 (3)
- May 2022 (1)
- April 2022 (4)
- March 2022 (2)
- February 2022 (5)
- January 2022 (7)
- December 2021 (1)
- November 2021 (3)
- October 2021 (2)
- September 2021 (1)
- August 2021 (1)
- July 2021 (3)
- June 2021 (1)
- May 2021 (4)
- April 2021 (4)
- March 2021 (4)
- February 2021 (2)
- December 2020 (1)
- November 2020 (1)
- October 2020 (2)
- September 2020 (1)
- August 2020 (3)
- July 2020 (2)
- June 2020 (3)
- May 2020 (1)
- April 2020 (1)
- November 2019 (3)
- October 2019 (1)
- August 2019 (1)
- July 2019 (1)
- April 2019 (1)
- March 2019 (1)
- January 2019 (1)
- October 2018 (2)
- August 2018 (1)
- July 2018 (1)
- June 2018 (1)
- February 2018 (2)
- October 2017 (1)
- September 2017 (2)
- January 2016 (1)
- February 2015 (1)
- January 2015 (1)
- December 2014 (2)
- September 2014 (1)
- February 2014 (1)
- January 2014 (1)
- December 2013 (3)
- October 2013 (1)
- September 2013 (1)
- June 2013 (1)
- January 2013 (1)


Comments (2)