
Share this
by Luminite on Oct 6, 2021 9:39:00 AM

The biggest concern when it comes to flexo printing equipment is repeatability. Having a high rate of variation between print runs is never good, so taking steps to improve your repeatability should be your utmost priority.
One of the best methods for ensuring repeatability is to fingerprint your flexo printing press. This press-fitness test is designed to show what areas of the press are up to speed and which ones might need work. Ideally, you’ll have optimized your press prior to the fingerprint, and the fingerprint will act as a second layer of insurance that your press is squeaky-clean.
Every printer should use the fingerprint test. After all, if you’re investing a lot of money in a top-of-the-line printing press, you want it to perform just as well after a year as it did on day one.
Why Fingerprint Your Flexo Printing Press?
Fingerprinting is a calibration process that makes sure your flexo printing press is capable of printing the lines and textures you need. It also estimates dot gain to create a dot gain compensation curve. How much ink spread you’ll see depends on the:
- Type of press
- Ink and surface tension
- Substrate
- Printing speed
- Anilox line count and volume
The term fingerprinting is slightly deceiving, seeing as how a person’s fingerprints never change. With printing presses, a fingerprint might change as the press ages or new components are added.
Fingerprinting is a vital part of any flexographic printing operation as it ensures repeatability and readability. Fingerprinting your press involves testing the relationship between your ink (its viscosity), mounting tape, anilox, and substrate.
While some believe the fingerprinting process can be skipped to save time, Fingerprinting should be considered a necessary part of starting a new printing project to ensure you get optimal repeatability out of your press.
Without fingerprinting your press before each new project, you’ll certainly lose time to press setup or end up with a less desirable print.
How to Fingerprint a Flexo Press
Fingerprinting your printing press is kind of like a baseline fitness test; we’re putting the press through its paces. Ideally, the press should have already been optimized prior to the fingerprint, otherwise the results may be skewed.
Once you’ve conducted routine maintenance and optimized your press, perform a banded anilox trial. This will determine which anilox roll should be used for the proper ink color. 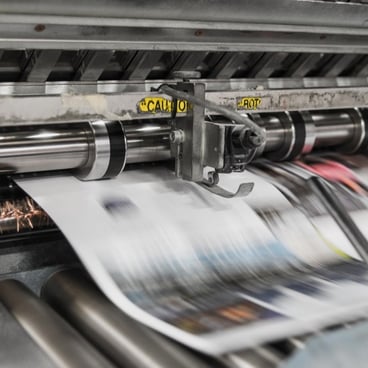
Here are a few other tips for prepping for a fingerprint:
- Use the same inks and substrates as in the desired print run (check ink pH and viscosity as well as substrate surface tension)
- Check your cylinders and sleeves for TIR and consistency
- Run your press at the production speed
- Use clean/new components (anilox, doctor blades, stickybacks, etc.)
- Let the press run for at least 15 minutes before recording results
It’s important that the conditions of your fingerprint match the actual printing conditions so you can get the most accurate results.
But perhaps we’re getting ahead of ourselves. Let’s talk about the fundamental part of a fingerprint: the fingerprint sleeve itself.
Anatomy of a Fingerprint Sleeve/Plate
To the untrained eye, a fingerprint test sleeve or plate looks like an indecipherable mess of lines and text. But, those designs are crucial for identifying the press’s capabilities.
For example, a fingerprint sleeve should have:
- Text: Both relief and reversed text as small as 1 pt. This will determine how well the press can handle fine printing and how the reversed text closes up.
- Blocks of screen values: This test will take all four colors (CMYK) and overlay them on top of one another. The black comes last, and often, it won’t even be touching the substrate. The goal of this test is to see if the press can handle CMYK printing without smudging.
A fingerprinting sleeve/plate will let the sleeve/plate manufacturer know if certain values for a client’s print are possible. Say a client wants a 133 line scaled to 80% -- the fingerprint should show what that looks like.
In addition, the fingerprint results allows technicians to create a dot gain compensation curve which helps the printed tone values match a baseline.
Final Fingerprinting Considerations
Most flexo printing equipment manufacturers have standard fingerprinting sleeves/plates because they have specific values they’re looking to test. But, sometimes the client also has values they need tested, like customer art or other designs. Talk with your manufacturer about adding custom details to the fingerprint sleeve so they can be tested before the actual print run.
Another key consideration is who does the fingerprinting. Some pressrooms have that one guy who knows how to fingerprint in-house -- that’s great! That’s a good skill to have on hand.
However, letting your flexo printing equipment manufacturer run the fingerprinting test will yield better results. The manufacturer intimately knows the fingerprinting sleeves and conducts these kinds of tests every day.
When a printer gets a new press, it’s common for the customer to visit the manufacturer and together they’ll run a fingerprint. Make sure to bring your own sleeves with you -- or ask your sleeve manufacturer to send a fingerprinting plate. That way, both you and your press manufacturer will know the curves for dot gain and other critical information about the press.
Maximize Repeatability With a Flexo Printing Press Fingerprint
At the end of the day, you need to be able to pump out thousands of impressions that are exactly the same, and any impediment to that will cost you time and money. Save yourself the trouble of inaccurate prints by taking the right precautions before you even start.
Having the right fingerprinting sleeves/plates and a skilled technician’s advice at your fingertips (pun intended) will make all the difference.
Having troubles with your prints? Your image carrier service may be skipping crucial steps or there may be an issue with your ink or substrate. Check out our free printing defects guide below for more information:

(Editors Note: This blog was originally published in February 2021 and was updated in October 2021 to reflect current information)
Comments (3)